This site contains affiliate links. As an Amazon Associate, I earn a commission from qualifying purchases at no extra cost to you. Full Disclosure Here.
![]()
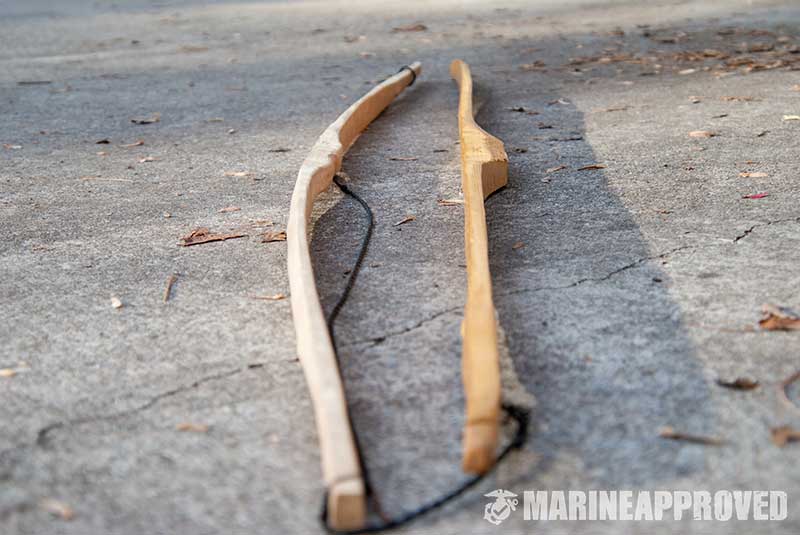
Longbows are great hunting and defense weapons. They are simple but very useful and powerful. This guide will take you through the following steps to create a bow.
In this guide, you will learn how to make a “hasty” bow, which I define as an all-purpose bow that takes less than a day to build. The process is the same for making any type of longbow.
This guide will show you how to make a longbow in a controlled environment. If you are reading this you probably aren’t stranded in the Alaskan bush. So we will focus on doing each step correctly and building the proper knowledge foundation. You will gain the experience that will allow you to easily make a survival bow or a more advanced large-game hunting bow.
After making a few hasty bows you can order a seasoned Osage orange or yew stave to make a “top-notch” hunting weapon.
What Tools Do You Need?
Even dedicated hunting longbows can be made with only a hatchet and a scraping tool. But since our aim is to develop an understanding of how to just make a bow, we will use whatever tools are available. Below are my suggested tool setups from beginner to advanced.
Each level up will help you get your end product faster but beware! Working faster without experience can easily lead to overdoing it and trashing your bow.
Here is the Tool List:
Beginner
- Hatchet
- Knife
- Marking tool
Intermediate
- Hatchet
- Knife
- Marking tool
- Drawknife
- Wood splitting wedge
- Hammer
- Bench vise
- Reciprocating saw
- Cabinet maker’s knife
Advanced
- Chainsaw
- Hatchet
- Knife
- Drawknife
- Marking tool
- Wood splitting wedge
- Hammer
- Bench vise
- Band saw
- Belt grinder/sander
- Chainsaw file
Here Are the Steps to Create a Longbow
I’ve broken this guide into 11 steps. If you have any questions for me while going through this guide, let me know in the comments section and I will reply as quickly as possible.
1. Selecting the Right Tree
Selecting the right tree doesn’t matter much when making a hasty bow but there are some considerations to make. There are two different types of trees to make bows from; hardwood trees and softwood trees.
Hardwood trees such as oak, maple, hickory, birch, beech, and cherry can make great bows. Hardwood has the most strength and ability to return to its original form on top of being very durable.
Softwood trees can make decent bows but will lose a lot of their strength and take a large amount of set after a few draws. But softwood bows can be made very quickly.
Softwood trees are great when making bows for the first time. Because the wood is soft they are easy to work, which reduces the time you spend on them. I started by making softwood bows and still have a couple I use for target practice and shooting at annoying birds that wake me up in the middle of the night.
One difference between hardwood and softwood trees is the amount of “set” they take. Also called “string follow” but set is easier to spell so that is what I am sticking with for this guide.
The “set” is how we measure how good a bow retains its original form. Basically, if you start with a completely straight bow, string it up, and draw it several times, it will remember that stress. After you unstring the bow, you can see how much set it took because in most cases it won’t return to its perfectly straight form. After the set takes, it will almost never go back to the straight bow you had before.
Set is our enemy because we lose some of the tension and snap of the bow. The larger the set, the less string tension we can put into the bow during a draw. This results in a slower arrow. We want the smallest set possible and you usually get the least set from hardwoods.
Just remember, you’ll have the best build experience with softwood trees but pick anything you like unless it is an evergreen. Evergreen trees are usually full of sap and are the weakest trees for bow making.
For your first couple of bows just go find a tall straight tree (non-evergreen) and worry about hardwoods vs softwoods when you get more serious.
Once you find a straight tree start looking at shape and size. For a hasty bow, we want something about as big around as a roll of Duct Tape (about 6 inches across). It doesn’t have to be exact so don’t worry too much about the girth. A survival-style bow can be made from a smaller sapling but will be more of a one-use type bow.
Height is the next thing to focus on. We want our finished bow to come up to our eyebrow when standing next to us on a flat surface. So we need to find a tree that has a straight section near the trunk that is about as long as our body.
Try to find a tree with the section you want free of large branches and knots. This will be important later because knots and branches create weak points.
![]()
Now break out your ax or saw and cut as close to the ground as possible. We want as much of the tree as possible. I’ve wasted a tree by cutting it exactly for the length I wanted only to find termite damage 4 inches from the top end. If I would have cut closer to the ground I could have made 4 bows.
2. Creating a Stave
Now that you have your tree, start marking your sections. Try to get as many straight sections out of the tree as you can. The more sections, the more bows you can make. Again, choose a straight length with few branches and blemishes. Cut sections roughly the length of your body and feel free to spot yourself a couple more inches.
Once you have your sections take a look at the ends and figure out where you can split the logs to get the most bows. Take a pencil or marker and draw stave profiles at the end of the logs. The profiles will look like triangles with the tip ending at or near the center of the tree. Try to visualize your bow inside the tree when making your profiles.
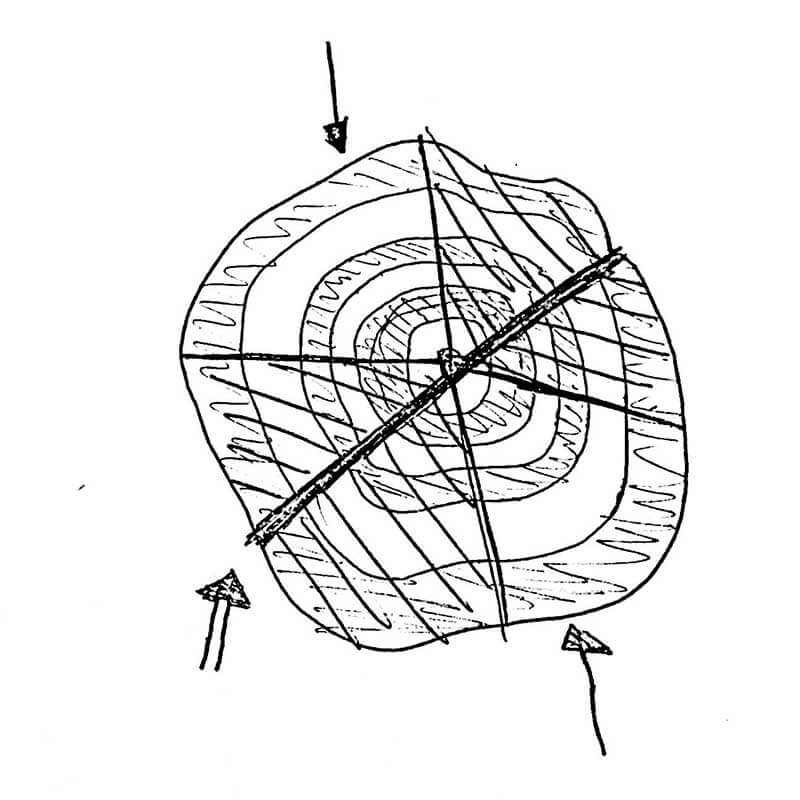
Sometimes you can split a 6-inch tree into quarters and get 4 bows per section.
We want our stave to be wide enough to get a 3-inch wide bow so don’t go crazy splitting. Always give yourself more width, thickness, and length than you think you need.
It is better to get two usable staves than four that end up too small for unexpected reasons. In most cases, you just need to split the sections into equal halves. So just draw a line straight across the section and split on the line.
This all depends on how big of a tree you cut down. Sometimes larger trees have multiple bows within one stave. But if your tree was four to six inches across then just do one split right down the log.
Start by driving your hatchet into the end with the blade on the line you drew. Use a hammer to get it started. Let the section split the way it wants to go. If it starts to twist don’t worry about it. Sometimes a twisted stave can still be used and give you a really unique bow.
I usually use two hatchets to split larger sections. I hammer one hatchet in until the section starts to split. Then I place the other hatchet in where the split gets tight and hammer it in until the other hatchet is free.
Once your sections have been split go ahead and scrape the bark off. You can keep the bark on if you chose a smooth bark tree like a beech. In a survival situation where you need a bow for a few days, I would just leave the bark on. The bark can add strength for a little while but usually starts to work against the bow after several draws.
For bark removal, I use a dull draw knife but you can easily do it with a hatchet. Lean the split log against another tree or your house and pull the draw knife downward. Always take care to only remove the bark. We don’t want to damage the wood underneath until we find the ring we want to isolate.
Once the bark is removed you now have a bow stave.
From now on we will use different terminology to describe parts of the bow. The side the bark was on will be the “back” of the bow. The back of the bow is the side that will face your target. The “belly” of the bow faces the shooter. The limbs of the bow are well, the limbs. The limbs are the part of the bow that isn’t the handle.
Seasoning Your Stave
For a hasty bow, seasoning your stave isn’t something to really worry about. Just know that seasoning means allowing your stave to come to the right water content. Fresh-cut wood has a high amount of water content. When left to dry, it will come to equilibrium with the environment when given enough time. Quality bows are always properly seasoned but this process could mean leaving your staves in a dry place for more than a year.
Seasoned bows will have less set and be more resilient than an unseasoned bow. If you were able to get multiple staves, debark them and put them in a dry place with plenty of airflow. Seasoning is a totally different topic so when you want a serious bow just buy a stave that has been pre-seasoned.
If you are getting serious about bow-making start stockpiling your staves. Seal the ends of the staves with glue to prevent checking (unwanted splitting). Mark them with the date they were cut and wait at least 8 months. If you have super dense wood, like Osage Orange, I would wait at least a year if you live in a climate that is pretty humid most of the year.
For now, we aren’t waiting on a bow to season. This isn’t a serious 90 pound draw bow anyway and will only be used to gain experience and hunt smaller game. In a survival situation, it will be all you need. Just don’t try to take down a grizzly bear for dinner.
3. Shaping the Stave
Let’s start by looking over our stave and circling any knots. Now, we need to figure out how to place our template in a manner that avoids these knots as much as possible. In most cases, you won’t be able to dodge all the knots. Just take care to place the largest as far towards the center of the bow as possible if you can’t miss it.
Knots on the edge of your bow can end badly for you. Think of it this way, if you take a sheet of paper and make a small tear on the edge and pull from the ends what happens? It will completely rip in half starting at the tiny tear you made.
Now, poke a hole in the center of another piece of paper and pull from both ends. It is much more difficult to get it to tear. Sometimes when it does tear it doesn’t even originate from the hole.
Knots act the same way. Knots create a weak point that can cause a bow to fail if not properly “worked”. So we have to take special care to avoid having them on the edges of our bow. Don’t worry if the knots are tiny just avoid the big ones.
Don’t worry too much about knots near the center. We will take special care of them later but they usually won’t give us much trouble.
Let’s keep our design simple. First, we find the center of the bow. Then we draw our handle. Once we have the handle drawn we will start to taper out to the widest part of the bow. From there we create a shallow taper all the way to the tips. Check out figure 4 for a guide.
I usually get a roll of paper and draw my shape on it first, cut it out, and then tape it to the stave. This way I can use the paper as a template to draw around as well as get the placement perfect.
A big note on this is to not get too caught up on the design and having everything measured to the nearest millimeter and perfectly symmetric. Save this effort for a serious bow. Bows can have crazy shapes and still function very well.
Now that you have drawn your bow shape on the stave you can proceed to cutting and shaping.
Cutting and Shaping
Let’s get rid of the wood we don’t want. You can easily use a hatchet for this but take care not to gouge the wood and split huge chunks out. If you go in too deep you risk a split going into your bow and ruining your stave. Take short and shallow strokes.
This is the first process that is going to take some patience. You haven’t gotten deep into the process yet so if you make a huge mistake and split off too much just start over on a new stave. Just remember what you did and take it slow next time.
Once you get close to the outline you drew start dialing back on the hacking. You don’t have to perfectly cut out the shape but we want it close. We will come back later to smooth out these edges.
If you are lucky enough to have access to a bandsaw you will be able to knock this part out quickly. Understand that when using power tools you detach yourself from the “art piece” you are working on. You gain more experience doing it all the old fashioned way.
If you must use power tools, I won’t judge. I started making bows primarily with power tools after my third or fourth bow. Once you do it once it just becomes too time-consuming.
Now you should have the basic shape of a bow.
4. Chasing the Ring
This is THE most important part of making the bow. Let’s talk about the back of the bow. Remember, the back is the side the bark was on. The belly of the bow is the side that will face you when you string it up and draw it.
Before we do anything else we are going to finish the back of the bow. Take extreme care in following the steps in this section.
The easiest way to do this is to clamp your bow in a bench vise at the handle.
First, look at the tree rings on the end of your stave. You might have to sand and wet the end to see the rings better. What we are looking for is the thickest and darkest ring that is closest to the back of the stave. Don’t pick one very far down because you will end up with a really thin bow in the handle.

Tree rings alternate between light and dark. The light and dark rings represent one year of growth. In most cases, the dark ring is the ring we want to isolate because it is usually the strongest.
Most of the time you can count down 3 or four rings and get into thicker rings. You should notice that the rings closer to the bark look different than the more central rings. This is what is referred to as “new wood” the new wood is the freshest and therefore the weakest. So we need to get rid of the new wood if we can.
Since the new wood is only 3 or 4 rings we won’t lose too much thickness.
Once we identify the ring we want. We need to mark it somehow. So just use a pencil and draw lines to it so you won’t forget that ring.
Now start scraping the back of your bow. At this point, I use a cabinet maker’s knife but you can use a regular pocket knife or hatchet. This is strictly a scraping job. DO NOT start hacking at the wood and do not use grinders or sanders. We want to take small slivers off with each pass so we can see and feel what is happening.
When you come to a knot be very careful. The wood fibers run to the knot and stop so if you scrape over one side of the knot you might end up lifting the fibers and gouging the wood. The knots will be raised higher than the rest of the finished bow if you do it correctly. This is normal and since the knots are weak it is better to have more wood there anyway.
When you look at the back of your bow think of a smooth flowing stream. If there is a large rock under the surface there will be a bulge in the water. The fibers of the tree do something similar. They build extra fiber over and around the knot. Let’s keep the extra fiber there.
As long as you don’t violate a ring (go through the one you want), your knot will be as thick as it needs to be.
Just handle the knots with care. I’ve gone too quickly with the scraper over the knots and ripped through 3 or 4 rings all at once. If this happens it might be ok if it is small but it does increase the risk your bow will break.
Pay attention as you scrape. Don’t get carried away and start going too fast. If you blow through the ring you were targeting you will have to try again on a deeper ring. You can only do this so many times before your bow will be too thin.
You’ll start to get a feel for the wood and where each ring layer ends and begins. The goal here is to get down to the ring we selected and have the entire back of the bow showing one complete ring.
I scrape down one ring at a time over the length of the bow. This way I can keep track of what ring I am on. Once you scrape all the other rings off you should have a very smooth and uniform back.
Run your hand over every inch and admire your hard work. If you feel a rough spot, lightly scrape until it is smooth.
5. Shaving the Belly
At this point, you want 2 ½ inches or more of thickness where your handle will be. If you don’t have that much thickness don’t worry. You will just have a bow with a light draw weight.
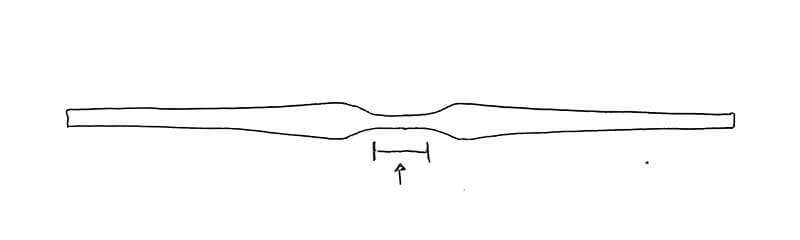
Just like we did before when we created our basic shape, we will draw the profile on the bow. Go ahead and give yourself at least 3 inches of thickness across the entire handle. Eventually, the handle will be worked down to fit your hand so give yourself more thickness than necessary.
Draw a side profile similar to the one pictured. Note how the thickest part is the handle. As you move down the limb, the thickness quickly drops off then stays constant all the way down.

Here is where we try to imagine what we want our draw weight to be. If you want a 70 lb pull, you need more thickness than a 40 lb pull. But we aren’t trying to get the draw weight right at this point so, as always err on the side of caution and leave more thickness than necessary.
Guess what needs to be done now? Yep, start removing material. At this point, you are well aware of how easily you can split too much wood out. Just be careful because if you remove too much accidentally you will greatly reduce the draw weight.
If you are cutting with a band saw, be careful not to create corners in your cut. You want the shape to be one long curve. If you create a corner it isn’t a bad thing but you will have to file it smooth so you can pull your carpenter’s knife smoothly.
When you have cut out your basic side profile go ahead and face the bow “back” up and shave down the sides to fit the shape you originally began with. Remember, it doesn’t have to be perfect.
6. Floor Tillering
The tillering process is what allows our bow limbs to bend evenly. If they don’t bend evenly the bow won’t last long. Even a weak, inferior bow that is properly tillered will last longer than a bow made out of the best wood that wasn’t tillered correctly.
When we floor tiller, we stand the bow up on the floor, place one hand on the upper limb and the other hand on the handle. We then try to bend the bottom limb. If your bow doesn’t bend at all you are in a great place. If your bow bends very easily, you probably removed too much material and will end up with a lower draw weight.
![]()
Assuming your limbs don’t move that much, we will clamp our bow “belly” up in the vise. Now start shaving the belly in long smooth strokes starting at the handle and moving all the way to the tip.
Work your limb in this way for a while and try flexing it on the floor again. Once it starts to flex work the other limb in the same manner until it flexes the same amount.
Repeat the above steps until the bow is flexible enough to string. Note that you don’t want it to be too flexible. We still have work to do when we do the full tiller. At this point, our goal is only to make it flexible enough to get a string on it.
When you are pleased with the floor tiller go ahead and make a handle. Only remove enough wood to give your hand a comfortable grip. And don’t alter the back of the bow. Let me make myself clear. DO NOT ALTER THE BACK OF THE BOW!
Keep the handle changes to the sides and belly portions. If you want an arrow shelf go ahead and make one. I’m not a big fan of arrow shelves because I lose control of the arrow with my “brace” hand. But, to each his own.
7. Making a String
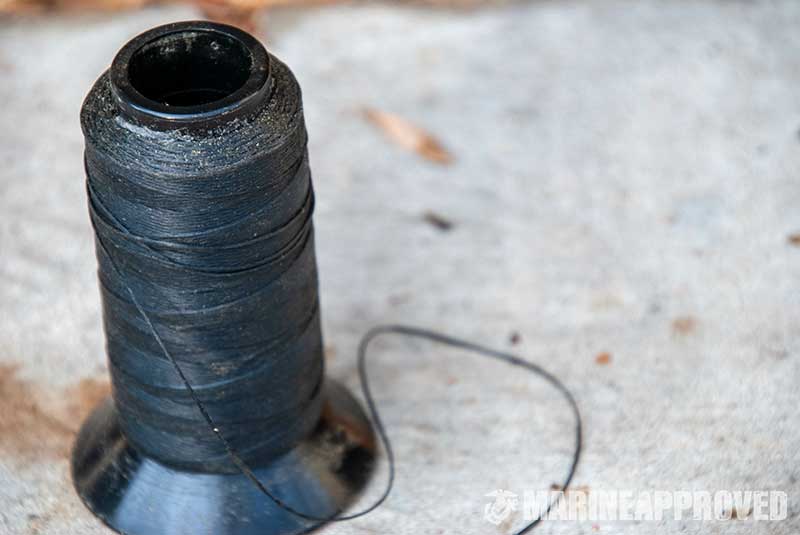
Now that you are ready to start tillering, you need to make a string. Buy some Dacron B50 bowstring and some string wax. You don’t have to have the wax but it keeps the strands together.
Now, we need to make a string jig. I use a wooden post to anchor my screws in but all you need is two points that don’t move. There are many ways to do this but this way gives me the best results.
Drive a wood screw halfway in at one end of the board. Now measure your bow. Whatever number you come up with add 20 inches to it. So if you have a 70-inch bow your number should be 90 inches.
The new number tells you how far the second screw should be from the first. Figure 9 shows the layout.
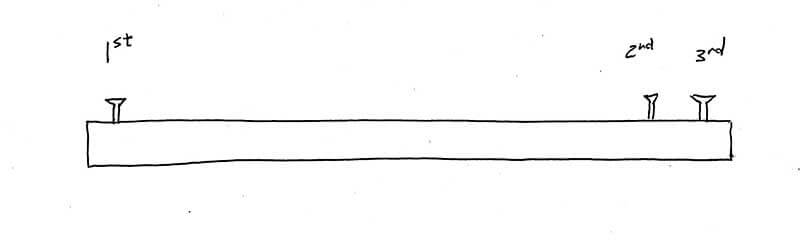
Drive a third screw halfway in 2 inches from the 2nd screw. Make sure all three screws are only halfway in the board and that they are all in a straight line with each other. Your jig should look similar to figure 9.
Now, tie the end of your string to the 1st screw (the one by itself). Once you have a good knot start wrapping your string from the 1st screw to the 3rd screw. Make 10 total loops. This will give you enough strength to bend a really heavy bow but will be too thick to use for shooting. Call this a tillering string from now on.
Next, cut the strings by the 1st screw. Grab the bunch on each side and lay them further away from each other. Always maintain contact with the 3rd screw by keeping the bunches pulled tight.
Start separating the bunches of strings on both sides of the board (or post). You want an even split. Since we have 10 strands in each bunch we need to make two 5-stranded bunches.
Take care to keep the strings close to level with the board. Once we start combining strands we want them to be underneath the 2nd screwhead. Separating and exchanging strings will form a loop around the 2nd and 3rd string.
Once the bunches are separated, pair a 5-stranded bunch on the left side of the post with a 5-stranded bunch on the right side of the post. Take the remaining 5-stranded bunch on the right side of the post and pair it with the remaining 5-stranded bunch on the left side of the post.
You should have a 10-stranded bunch on each side of the board now and there should be a lot of strings crisscrossing at the 2nd screw.
Begin twisting each 10-strand bunch clockwise. Start your twisting near the 2nd and 3rd nails. As your string forms move backwards with it. It is best to twist the bunch on the left with your left hand and the bunch on the right with your right hand.
As you twist each individual string clockwise, you will move your hands in a clockwise manner. Once the twisted bunches cross, switch hands. Just to reiterate, you are twisting the left and right bunches clockwise while twisting them both together in a clockwise motion.
When you reach the end of your string tie a small knot to keep everything from coming apart. If you twisted everything correctly, the string should want to stay the way it currently is twisted. The knot at the end keeps it from fraying.
In a survival scenario, you are going to probably just use your shoestrings as a bowstring.
Nocking the Bow
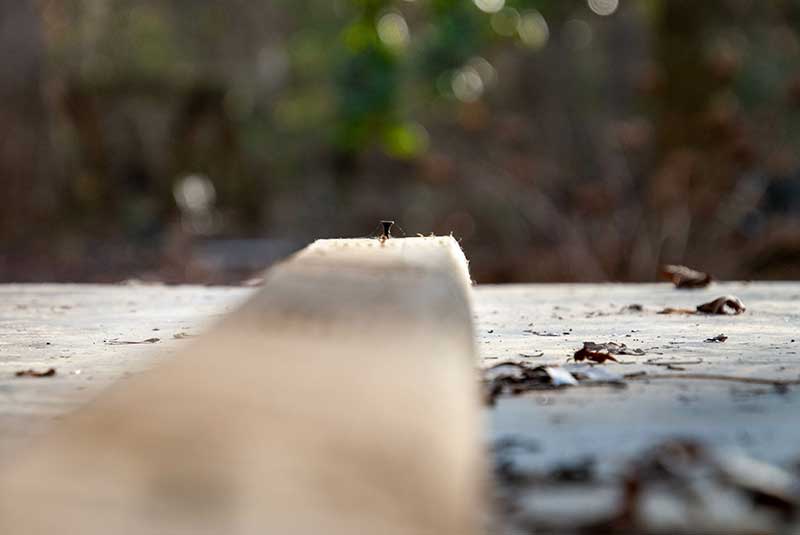
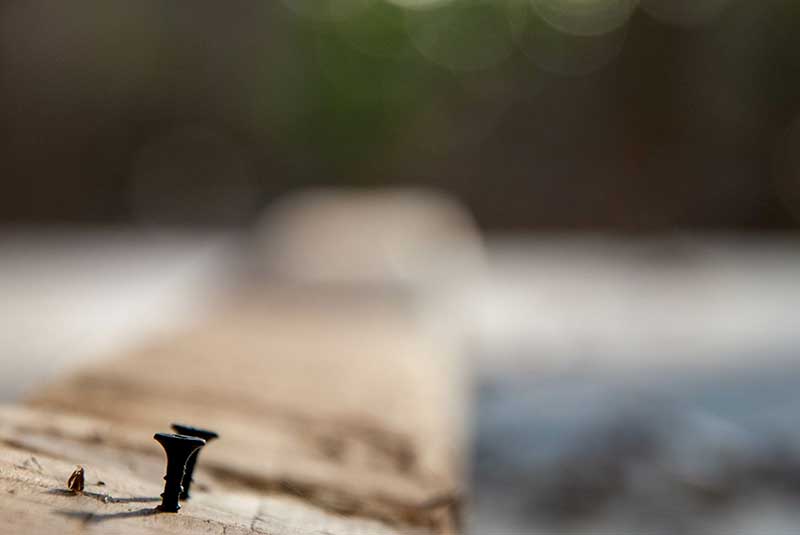
After the string is finished you need a way to attach it to the bow without having it slide around. Place your bow in the vise again and grab a chainsaw file or a knife. Use a pencil to mark a line across the back of the bow about 1 ½ inches from the tips on both ends. This will be where the nock starts.
Place the chainsaw file on the side of the bow and start filing at about a 45-degree angle. The nock needs to follow a similar line the string does when the bow is strung. Don’t go too deep with the knock. It needs to just be deep enough to keep the string from sliding out. Slightly round out any rough edges to prevent future fraying of the string.
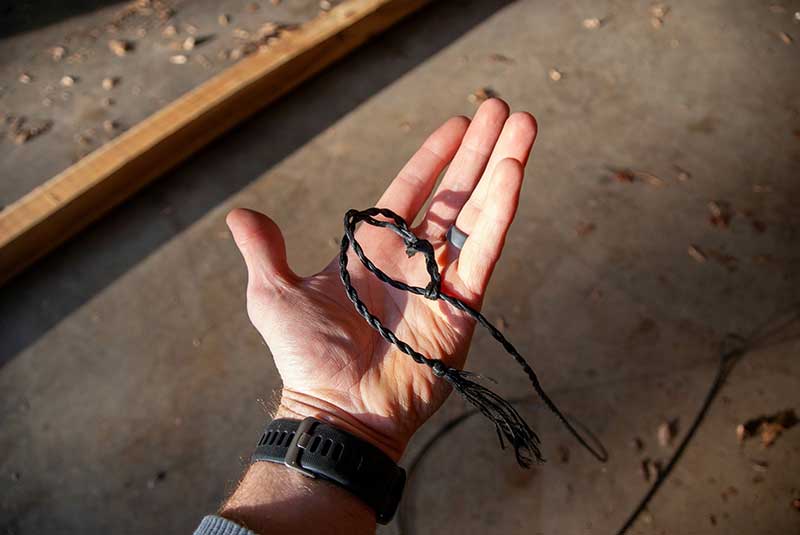
Bowyers Loop
One side of your string has a built-in loop but what about the other end? This is where learning a bowyers loop will be helpful.
The bowyers loop will allow you to adjust the string without permanently changing the length. It is the only loop I use for longbows because I can shorten it to make my bow have a stronger pull or put it on another bow of a different size.
First, make a simple loop.
Next, take the loose end around the “trunk”. Essentially taking a U-turn around the main string.
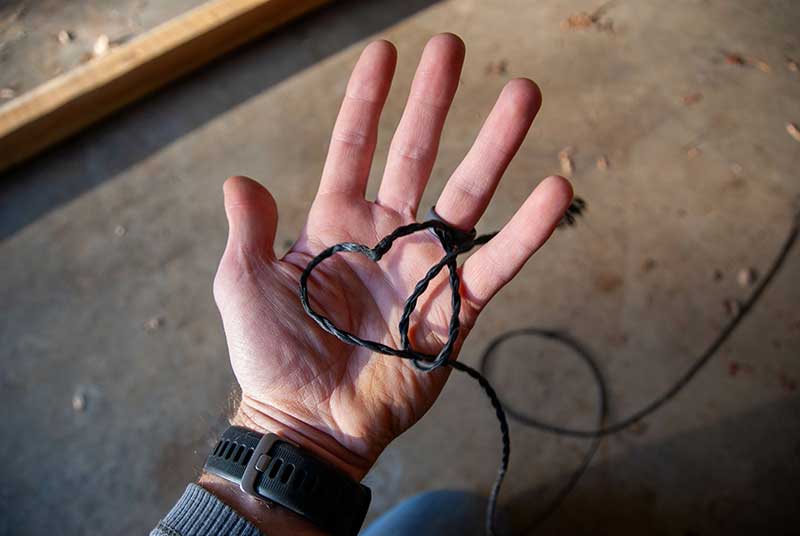
Finally, put a couple of wraps in the string by following the loop backwards (wrap in a direction that takes you back to the longer portion of the string).
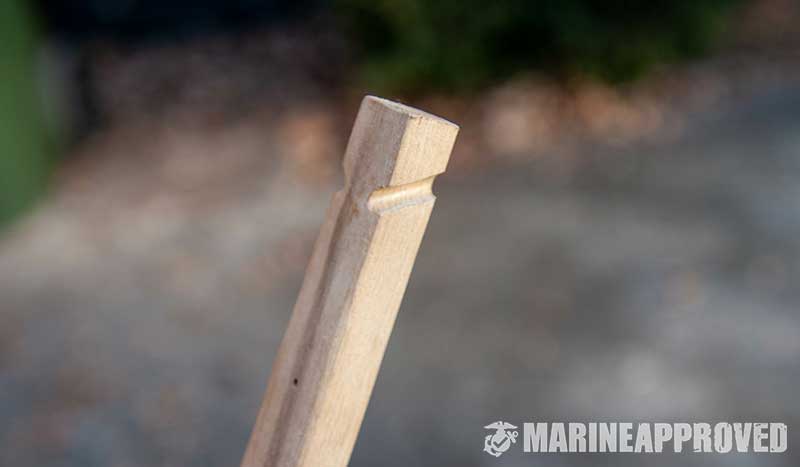
Making a Tillering Stick
I made this tillering stick out of a scrapped bow. You don’t have to go buy wood to make one.
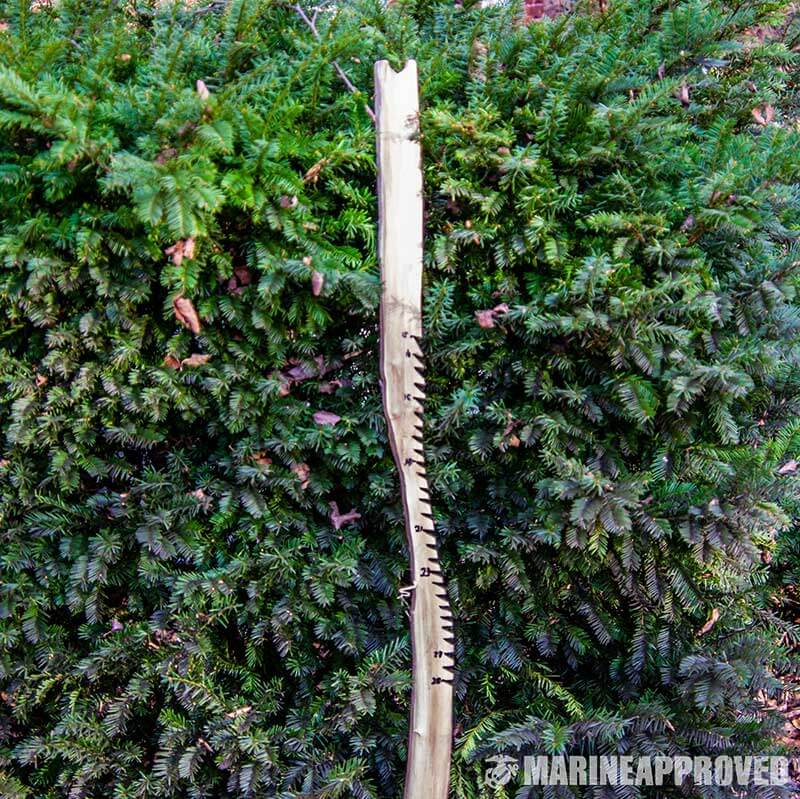
Before we start the final tillering process, grab a 2×2 or 2×4. Cut a U-shape at the top of the stick. It needs to be big enough to fit your bow’s handle. When the shape is cut the bow will be placed on the stick and resemble a crossbow. When your bow fits well on the tillering stick start cutting notches.
The notches will be spaced about an inch from each other and should resemble a large jigsaw blade. Measure from the top of the stick and mark down the notches in about 1-inch increments.
Your setup should look like figure 10.
Finding Your Draw Length
For some reason, there are thousands of ways to measure draw lengths. I’ve even seen equations on how to calculate them. I’m not saying those ways are wrong but why make it harder than it has to be?
You will never need to know down to the nearest millimeter what your draw length is. Your body will constantly change and your measurement will too.
For a longbow, draw length just needs to be in the right ballpark. The great thing about shooting a longbow is you can pull to different lengths depending on what your target is and how you want your arrow to fly.
Grab a tape measure and hold it in your brace hand. Put your back and brace arm against a wall. Start pulling the tape as you would draw a bow. Turn your head and look at the tape measure. Draw the tape across your chest and up to the corner of your mouth. Extend your arm as far as you can. Really try to get as much stretch as you can.
When you feel like you are as long as possible, look down at the tape measure and remember the length. This is the draw length you will use from now on.
8. Full Tillering
The full tiller is the last step in making the bow. The whole purpose of doing this is to make your bow flex symmetrically in one smooth curve. As you refine the curve and remove material you will work the belly down until you get the draw weight you wanted at full draw length.
Stringing the Bow
If it is your first time stringing a longbow it will take you some trial and error but don’t give up.
Slide one string loop over the end of the bow and down the limb. Secure the other loop around the nock on the opposite end. Let the loose loop (that is sliding up and down the limb) rest on your hand.
Lean the bow on the ground, place a knee on the handle and grab the top limb of the bow. Start applying pressure with your knee and pull back on the limb in your hand. As the bow flexes, push the string up the limb until it falls in the nock.
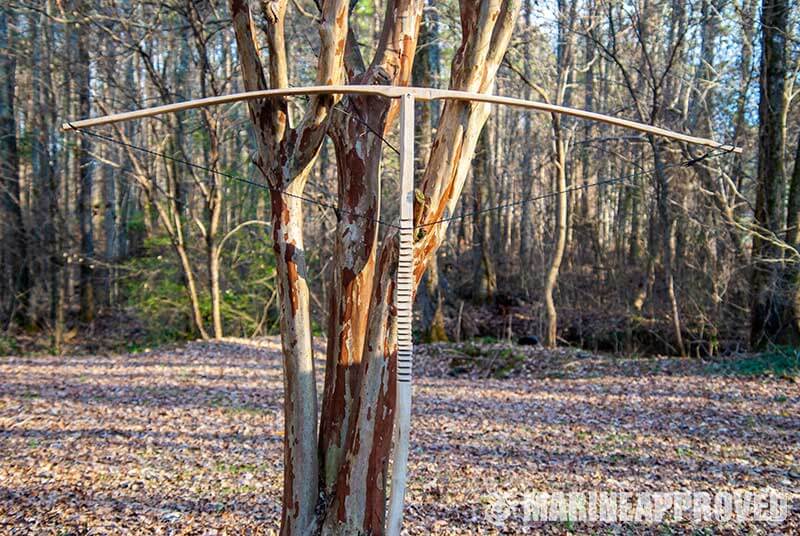
Tillering
All you need for this is your cabinet maker’s knife, a vise, and a bathroom scale.
Stand the tillering stick up on the scale and place the bow in the notch on the stick. If your scale has a zeroized button press it now. If it doesn’t just remember the weight of your tillering setup. You will have to subtract this weight every time you pull your string during this process.
At this point, you should know what pull weight you want. If you are using a softwood, aim for a 40 lb bow. You can get more out of it but this is a good weight for the material.
Your intent is to get your bow to flex enough to reach full draw. This isn’t going to happen the first time so we have to step down in increments and work the belly of the bow. Pull your string along the tillering stick a couple of inches and lock it into a notch.
Stand back and look at your bow. Pay attention to symmetry and how the limbs are bending. You don’t want a limb to look like it is kinking. The limbs should curve gently and look similar to the capital letter D. Only we don’t want the tips facing straight back.
If one limb is bending more than the other, focus on removing wood from the belly of the stiffer limb. Go slow on the scraping. Scrape 10 to 20 times and go back to the tillering stick to check the flex.
If a portion of your limb looks too stiff scribble over the spot with a pencil, remove your bow from the tillering stick, and scrape the belly where the pencil marks are for 10 to 20 strokes. Go back to the tillering stick and check the bend.
If a portion of the limb is bending too much, scribble over the spot and scrape the belly everywhere but that spot. By now you know that removing material will cause your bow to bend more in that specific area.
Repeat this process until the bow is evenly bending.
When you are satisfied with how the bow bends, pull the string and start watching the scale. When you get to your desired draw weight lock the string in a notch and check how it looks. Take the bow to the vise and remove the same amount of material from each limb. Use long smooth strokes.
Place the bow back on the tillering stick and pull down the string until you reach your desired draw weight again. You should notice that the string goes further down the stick. Always step back and look at how your bow is bending. If you notice one limb bending more, give the opposite limb more scraping attention.
Repeat the above steps until your string goes to the notch that is about 3 inches away from your full draw length. At this point, you are done tillering. It is always good to stop tillering several inches short of full draw because the bow will set after you start shooting and you will lose some of your power.
Undershooting your final draw length will give you some insurance. After the bow is broken in, you will be able to fully draw the bow and keep a draw weight closer to what you wanted.
9. Making and Selecting Arrows
Buying Arrows
If you are impatient like I am, just go to your local outdoors store and buy some arrows. Not every arrow is the same. Before shelling out cash, you need to know about arrow spine. The spine of an arrow is a measure of how much an arrow flexes at specific draw weights.
Shooting an arrow with low spine out of a heavy draw bow can snap the arrow before it leaves the string. Nobody wants an arrow shaft through their hand.
An arrow with too high of a spine for a bow will fly erratically.
When you draw an arrow and release the string, the string loads the arrow and actually bends it around the handle. So a properly selected arrow will shoot accurately each time.
Make sure you buy arrows rated in the draw weight range of your bow.
Making Arrows
Arrow making is its own art form and can be very complicated. For now, I’ll keep it simple.
Start by finding a sapling that is straight. There are certain types of wood that make great arrows but let’s just make one out of the first straight sapling you find. Try to find something close to the thickness of your pinky finger.
Cut to about 3 inches longer than your draw length. Debark and delimb the shaft and scrape it until it is smooth.
Straighten the shaft by holding it over an open flame. Heating up the wood relaxes the fibers. Don’t get it too hot, you want it to be just hot enough for it to start burning your hand but no hotter.
When the shaft is nice and hot bend it straight and hold it until it cools. This will take a couple of tries but have patience.
Next, cut about a half-inch slot for the string to fit into. Make the cut width smaller than the string thickness so it will “clamp” down on the string and stay put when you draw it.
Arrowheads
For the tip, either whittle it to a point, make an arrowhead, or use a flat piece of metal shaped into an arrow.
I use high carbon knife-making steel to make arrowheads for my wooden arrows.
To attach an arrowhead, cut another notch in the shaft to fit the arrowhead into. Use some leftover bowstring to secure it in place. If you do this, use some epoxy when inserting the arrowhead as well as epoxy over the string when you wrap it.
Fletching
Find or buy some turkey feathers. Any feather will do but turkey feathers are the standard. You can also make ducktape feathers.
If you are using feathers, slice them in half with a razor. Technically, the feathers should come from the same wing (left or right wing). If not, you’ll be ok for now.
There are many ways to attach the feathers to the shaft. We are going to take three feather halves and place them around the shaft at about 120 degrees from each one (3 feathers evenly spaced around the shaft).
Just use epoxy or strong glue to attach the feathers.
If you don’t have epoxy or glue, take some bowstring and wrap it in a spiral around the feathers. Start from the front of the feathers and work your way back. You want the string to fit between the feather fibers at ¼ inch intervals.
I have almost lost my mind using this method because the feathers are hard to keep in place at first. Honestly, just buy some epoxy.
In a survival scenario, you would either use the string wrap method on the feathers (using the inside fibers in a shoestring) or kill a small animal with a naked shaft.
If you kill a rabbit or squirrel with your naked shaft, you can remove the tendons that connect their muscle tissues. Rabbit Achilles tendons are gold in a survival situation. Let the tendons dry and split them into smaller strands.
Chew the dried tendon strands until moist and then wrap it around your feathers or arrowhead. When the tendon dries it will shrink as well as glue itself in place.
10. Drawing, Sighting, and Shooting
This is another topic that I could go into great detail on. But as always, let’s keep it simple.
Hold the bow by your side. As you raise it, cant it enough to keep the arrow resting on your index finger.
When drawing, pull the string to the corner of your mouth. The bow should be held at your side and as you begin your draw, the bow should come up. The bow should level with the target at the same time you reach full draw.
Look down the shaft and place the tip of the arrow below your target and release it.
Shooting a longbow correctly should be one fluid movement from drawing to loosing the arrow. There should be very little pause or none at all when sighting.
11. Refining
You can rub your bow with any type of furniture oil or wax if you want a water-resistant finish. I usually leave mine like they are.
I do use some rabbit fur to make string silencers. I was behind a car that hit a rabbit one day and I stopped to pick it up. Any animal fur will work but rabbit is just so long and fluffy.
I cut thin strips about 6 inches long. Since the bowstring is braided you can pass one end of the strip through the string and wrap it a couple of times around the string. To finish, pass the loose end back through the string. Once the fur dries it will shrink to the string and pretty much stay there forever.
Keep your new bow in a dry place and unstring it when not in use. Have fun and always be mindful of safety. Even a slow-moving arrow can severely injure or kill.
Wrap Up
I hope you found this guide useful! If you have any questions or comments, feel free to drop them in the comments and I’ll respond as quickly as possible!

I really enjoyed reading your article. Lots of great information! Looking forward to reading more.